Ouch!

Been soldering the piston tails, and got myself a nasty burn on my finger.  This is entirely my fault, because I’ve been soldering with a needle tip instead of a blade tip.  Soldering is now delayed until the blade tip arrives in the post (Friday, with any luck).

Meanwhile, beer and paracetomol.

Ribbed, for extra pleasure

I forgot.  The piston each have fine ribs along the barrels, to keep them in place when inserted.  This is no good to me, because i) the holes have been drilled to be extremely tight, and ii) several of the pistons have writing on them, and need to be lined up exactly.  Rather than ribs, the pistons will be kept in place by a small screw driven into the barrel from above.  So I have spent the last couple of hours carefully shaving off the ribs of each piston.  My thumbs hurt.

Soldering next.

Many screws later…

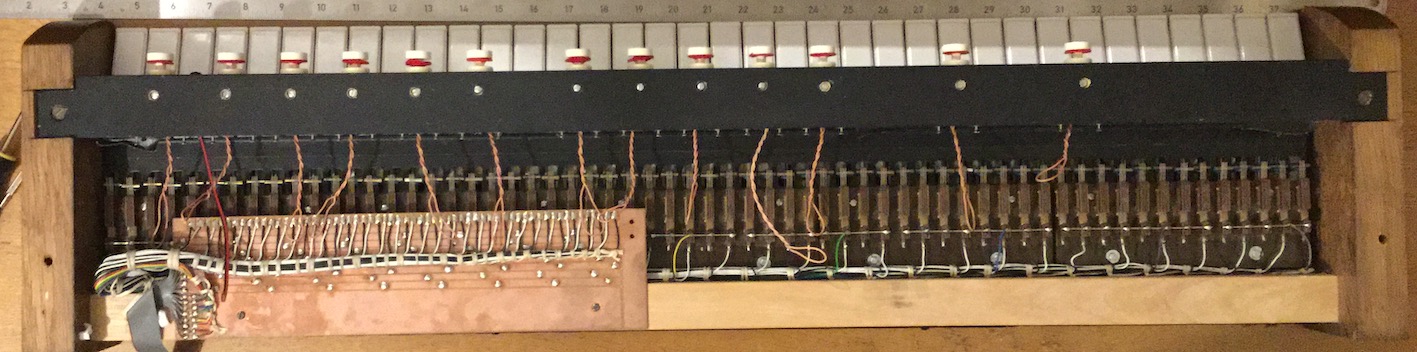
Why did I purchase lots of woodscrews?    This is why.

This photo has been eaten by a grue

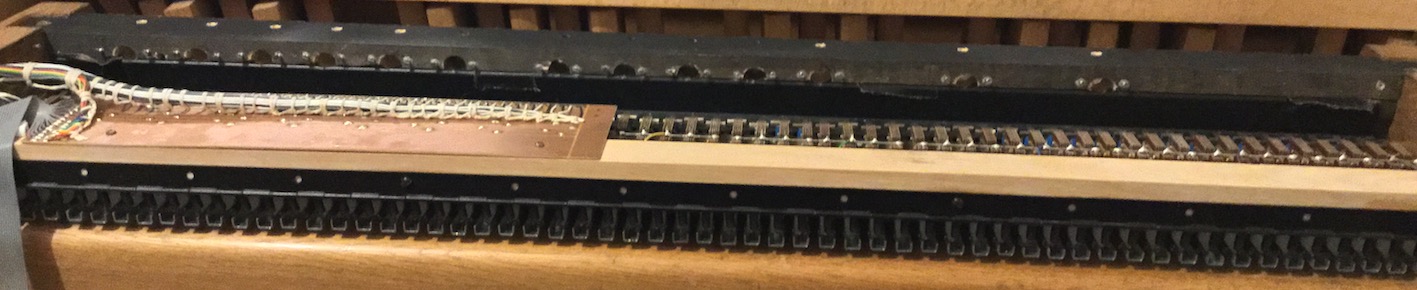
It’s a little hard to see in the image, but each of the piston holes is now flanked by a pair of screws.  These will be used as terminal posts to connect the pistons to the MIDI encoder.  For each piston, one screw will be attached to GND, and the other will go to the encoder board.  When a piston is depressed, it is told to brighten up, pull itsself together, and act smart it pulls the signal to ground, which is converted into a MIDI message and sent to the computer for processing.

Hole-drilling took little time (once I had determined that 2mm was the correct bit size, after cautious efforts with bits ranging from 1.2mm upwards).  Inserting 88 screws became boring very quickly.

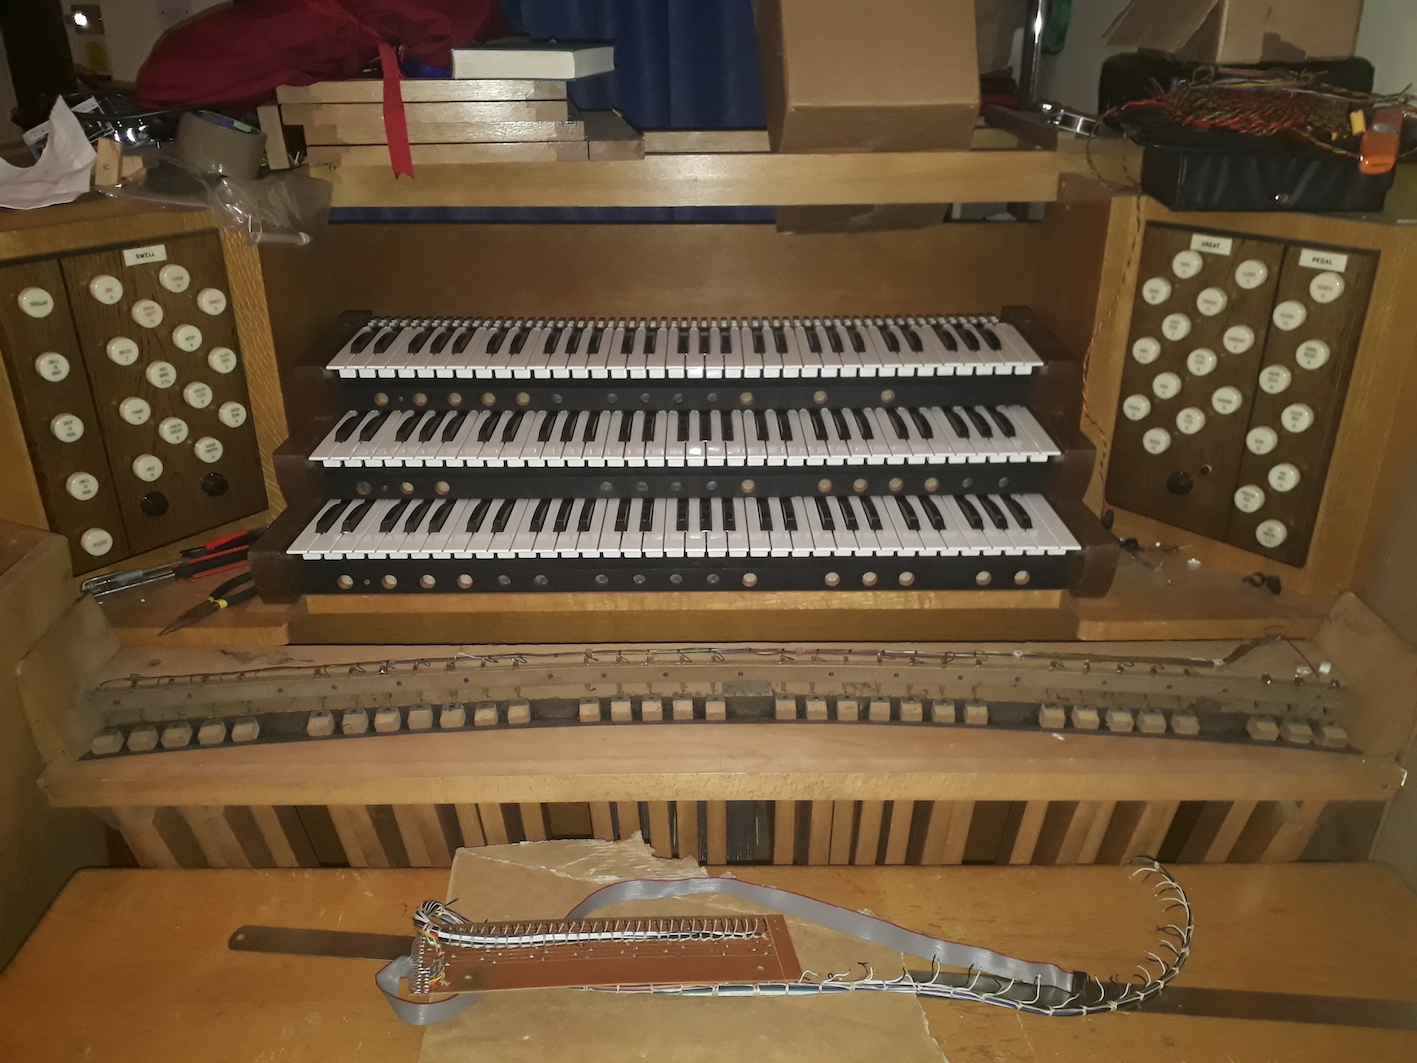
I visited Mr Norwich Organs last week, and came away with more wire than one person should comfortably possess, along with the usual sound advice borne from decades of experience.  The plan this week is to solder tails to the pistons and insert them into the rails, then begin the process of wiring them up.  Which means I will shortly have to start thinking about the placement of the MIDI boards.

What with one thing and another, it is unlikely that I shall get any sound out of the organ this side of Christmas, which is a shame, but with any luck it will be speaking its first notes in January.

Toys arrived

So, today I have received the MIDI bits, an earth busbar, micro drill bits, and collets for the dremel.  This weeked, I will hopefully be screwing the piston terminals into the back of the piston rail, and wiring up the keyboard stack.

Just don’t ask me about the farce that is FedEx.  Sheesh.

Ordered my first batch of MIDI hardware.

I’m still waiting for the pistons to come back from the engravers (next week some time), so I thought I’d spend some money on the MIDI hardware I need to connect up the manuals and pistons.  Bought some screws, too.  Now I have to live in the dark and eat potato peelings for the rest of the month.

I’m away for the whole of the first week in December, including the weekends, but my baby could potentially speak its first notes before Christmas.

It just got real.

69 contacts later…

… and the great manual has been wired up and continuity-tested.  I don’t mind soldering, but I don’t do it often enough to have developed the necessary asbestos fingers for the job.

I still have to re-wire the 16-way IDC output from the key matrices, to suit the requirements of the MIDI hardware, but that can wait until I actually have the MIDI hardware.  Piston engraving is next.

Partially-assembled keyboard stack

Here we go.  Many snippings-out later, and the keyboards are back in their oak frames.  Look upon my works, ye Mighty, and despair.  While you’re despairing, pay no attention to the clutter on top of the console.

This photo has been eaten by a grue

You will see on the bench a bit of circuit board and what looks like a spinal cord.  This is the matrix for the great manual, which had been carefully – and unaccountably – desoldered from the keyboard before I took possession of the stack.  Next job is to re-solder the 69 wires into their proper place.

After that, I will need to send the pistons off for engraving.  I’ve decided to engrave all of them, unless it turns out expensive, in which case I will not engrave the numbered pistons.  This is not uncommon in traditional English organs, and indeed, the Wyvern organ that was in this case when I bought it (last year) was thus.

Still on target to order the first MIDI bits next month, and then will be the moment of truth – do the keyboards actually work?

Pedal contact assemblies or reed switches?

I’ve just noticed that the first anniversary (1st September) of this blog slipped by unannounced.  I shall celebrate with a cup of tea.

Because I had nothing better to do this evening, I decided to have a look at the pedalboard.  This is, strictly speaking, out of order since the keyboards and pistons are not yet finished.  However, a conversation with a midi hardware supplier (probably the one I’m going to buy stuff from) prompted me to get out the screwdriver for a naughty peek.

Whereas most Wyvern hardware I have seen – especially the older stuff – has all the hallmarks of being made by craftsmen, the workmanship of the pedalboard is, I suppose, best described as ‘functional’.  This, coupled with the fact that the pedalboard is ever-so-slightly too small to fit neatly under the console, suggests to me that t is not part of the original console build.  There’s nothing wrong with it, it’s just not pretty.

So, the pedals make noises via the medium of 3-wire contact assemblies, which are very badly tarnished, and a couple of them are obviously damaged.  I could spend a lot of time laboriously cleaning each wire, and then replace the damaged ones, having tried not to damage any more in the cleaning process.  Or I could spend about £50 and put in reed switches in about the same length of time.

With such weighty decisions is my mind burdened this evening.  The dogs are no help at all.  I tried to engage in a spirited discussion of the relative merits of each system, but Betty started cleaning herself and Mia stared vacantly at me while drooling on the sofa.  Drools a lot, does our Mia.

Replacing the contact assemblies

Four contact assemblies on the choir keyboard were beyond straightening.  Fortunately my friendly organ engineer had some spares.  Prising them off was easy, although nerve-wracking, as it required the judicious use of a hammer and chisel.

This photo has been eaten by a grue

Having smoothed the surfaces down and got busy with the Araldite, the replacements are very firmly affixed and soldered.

This photo has been eaten by a grue

Close-up of the repairs.  Slightly over-araldited, and honesty forces me to admit that it isn’t some of my best soldering, but it is electrically sound, and I won’t see it.  Although I will know it is there, and it will haunt me through every Bach chorale.

This photo has been eaten by a grue

The drawing together of things

On a whim, I went carbooting this afternoon.  Picked up a couple of odds and ends, but most importantly I bought a Dremel.  Only cost £37 and looks hardly used (in fact only two of the bits appear to have been used).  I’ve checked the model and it currently costs £90 from Homebase.  Result.

Today’s work involved repairing the contact assemblies on the choir keyboard, but I’ll post about that when it is finished.  The main event was the reassembling of the swell keyboard in its frame, after cutting out wedges for the additional pistons.

You can see here the additional wedges.  Closer inspection will show you that my wedges are rather less expertly done than the original ones.  I tidied them up afterwards with my Dremel.  That was my justification for buying a new toy.

This photo has been eaten by a grue

And here is the keyboard fitted into the oak frame.  That took a while; the keyboard sort of guzunder and guzover the crossbars, and it has been a long time since I took it to pieces.  Mia is doing QA.

This photo has been eaten by a grue

I was going to take a photo of the completely assembled keyboard, but the light was poor and my iPad doesn’t have a flash (do any iPads have a flash?).  Tomorrow, maybe.

The next job for this keyboard is to test all the key contacts.  I think that the easiest way to do that is to wait for the MIDI encoder to arrive and plug it in.  Otherwise I’m going to need a third arm to manipulate the continuity tester and the keyboard.


Next Page » « Previous Page